Not everyone can say they have a green thumb. Most people are lucky to know someone who can simply navigate their way around a garden, let alone the garden shed. Green thumb, or not, garden maintenance doesn’t have to be as hard as you think – or as expensive.
To achieve a garden worthy of landscaping awards there are a few key words you need to understand: weeding, edging, mulching, cultivating soil, spacing and sizing. If these words sound like nonsense, keep reading! We’re here to break them down and relieve your garden-maintenance stress, on a budget.
Weeding
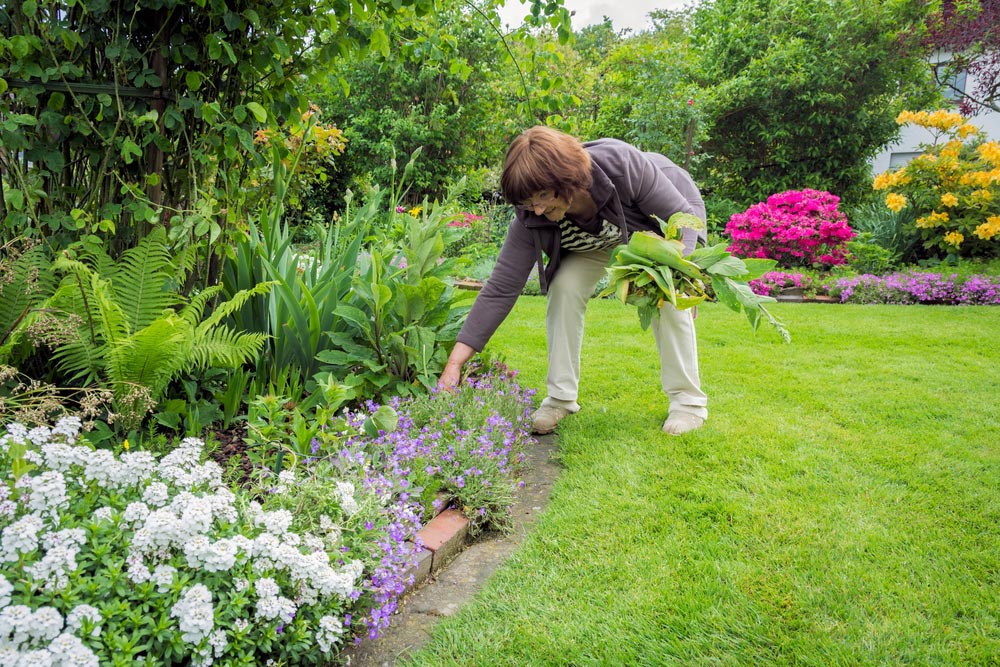
It all starts with weeding. If not the most tedious, it is the most important. There are two main ways to weed, by hand or with pesticides. By law in Mississauga — and Ontario at large — you can only use bio-pesticides and some low-risk pesticides for cosmetic purposes on your lawn and garden. Bio-pesticides eliminate unwanted pests using animals, plants and even some minerals. Canola oil and baking soda are examples of bio-pesticides that might be lying around your home. Low-risk pesticides pose little risk to the health of the user and the environment they’re being used in; they are also less likely to harm non-targeted organisms.
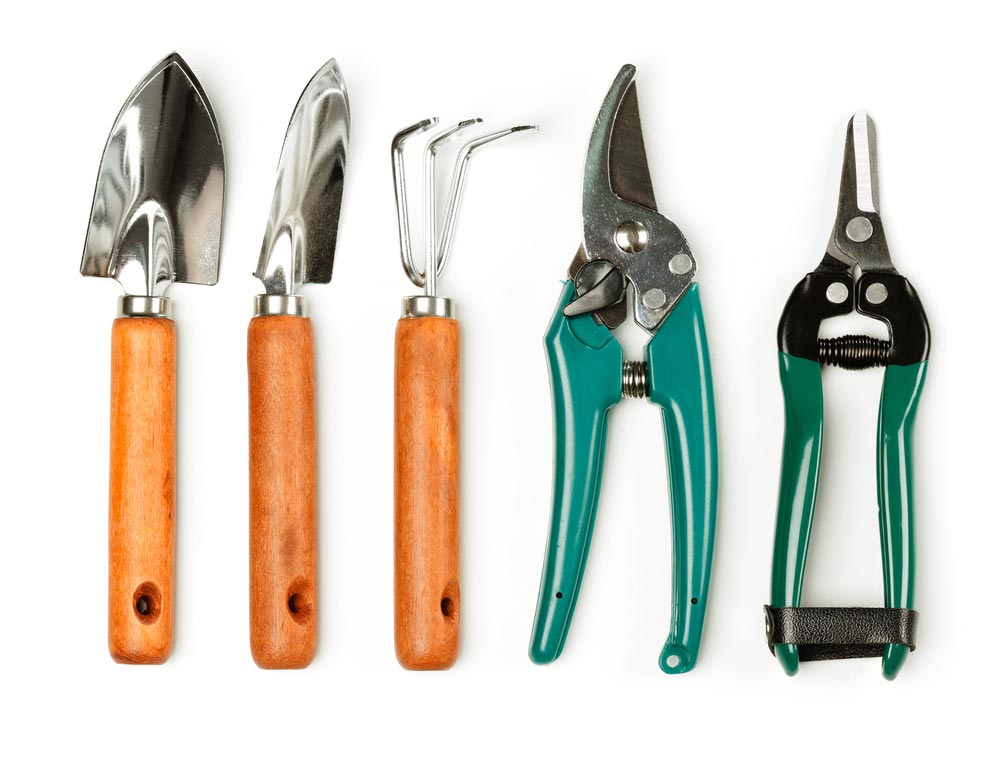
To avoid the hassle of checking which pesticides abide by the law, reach for a tool instead. There are a number of tools that can be used for weeding, the most basic being a garden hoe. For those pesky small weeds, a pointy Dutch hoe will do the trick. But for large weeds you’ll need an old English hoe. When deciding which tool is right for you remember two key words: length and weight. You want a tool with a handle long enough to touch the ground without you needing to bend over, and light enough for you to lift up repeatedly without straining yourself.
The biggest and most common garden maintenance mistake is digging around and under the targeted weed. Doing this will spread the seed, only making your problem worse. Simply drag the hoe on the ground moving the soil on top to pulling the weed out. It is best to do your weeding on a sunny, dry day — and this isn’t because these days are more enjoyable than rainy ones – it is to avoid having to pick up weeds after pulling them out of the ground. On sunny, dry days the heat from the sun will dry out the seed of the weed and prevent it from growing back.
Edging
Edging creates a barrier between flowerbeds and grass areas and prevents grass from growing in and consuming the garden. Some people use plastic barriers bought at garden maintenance stores in Mississauga, but over time those need replacing. This year instead of replacing them, buy a step-edging tool.
A step edger uses your body weight to cut a clean line between grass and a path, or flower bed. The sharp edge forms a semi-circle that is attached to a long handle. By stepping on the blade you push the tool into the grass with a slight right to left motion. Once removed, you have created air space that will prevent grass roots from growing in. By moving the grass, you lifted with the edger you’ll have a shallow trench between the grass and your bed. When laying new soil or mulch, make sure the trench remains by spreading it thinly and pushing it down with a shovel.
For the most aesthetically pleasing look, use a garden hose to outline where you want your flowerbed to come out to. By using a rock on each end to hold it in place, you can follow along the hose with your edger to create the perfect bed line. This tip is especially helpful if your flowerbed is interrupted by a walk way or path. Using the garden hose will ensure that the bed line flows over the path without being interrupted, looking even.
Mulching
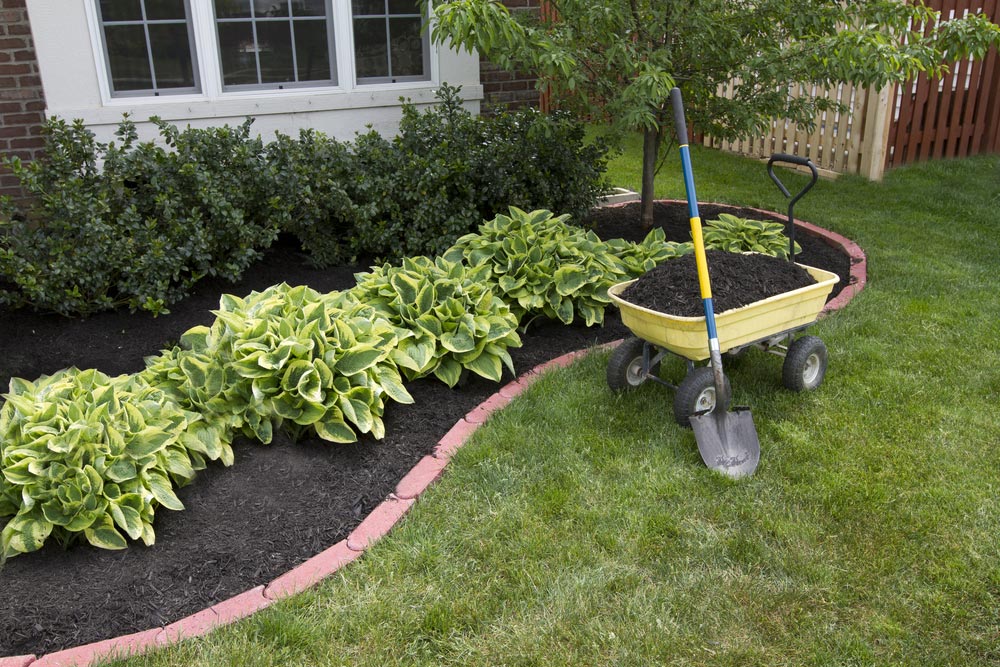
If you just finished edging a flowerbed and decided to make it a little bigger than last year, you should consider mulching the new area to help the soil retain moisture and prevent weeds from growing in. This step will save you time from both watering and weeding. There are seven different types of mulch to choose from, each with their own benefits for different plants and gardens. Try to keep mulch around two or three inches thick. Too little much wont stop weed growth and too much mulch will prevent water from getting to the plants roots.
Bark being the most common, can be bought either shredded or clipped and in the colour of your choice. While the colour is there for looks, this type of mulch is best used around trees, shrubs and garden beds where you won’t be doing a lot of digging in the near future (this type of mulch can be hard to move around). Compost and compost manure is another type of mulch that can be used just about anywhere, but is most effective at the beginning of the planting season to give plants a boost of nutrients.
If you’re really trying to get rid of weeds in the remote areas of the garden grass clipping mulch is best suited for the job. However, use this method carefully because it can compress making it hard for water to pass through, and tends to smell. If this method doesn’t appeal to you, but weeds are still a major issue, newspaper mulch might be the answer. Create a layer of 4-8 sheets of moist newspaper across the area and top it with one to three inches of another organic mulch. This method is also good a smothering grass to quickly start a new flowerbed, but users should be aware that not all newspapers use organic inks.
Shredded leaves are known as nature’s favourite mulch — and not because they’re completely free – because it attracts worms like crazy! This type of mulch is ideal for wetland gardens, or for vegetable gardens in the fall to prepare for winter. The downfall of this method is that it probably won’t look as good as some of the other methods. Straw and salt hay mulch is also not a winner for it’s aesthetic appeal, but it works well on vegetable gardens to prevent soil born diseases and to eliminate mud. Unlike bark mulch, these hays can be raked easily to make room for new plants.
Cultivating Soil
If you were stumped by the phrase, “cultivating soil” you can breathe easy, and laugh a little because this is just another way of saying digging, or loosening-up soil. As simple as it sounds it’s a very important step to ensure the weathered soil sitting on top gets broken down and mixed with the soft soil underneath. This allows air, nutrients and water to penetrate deep into the soil.
This step is usually done right before planting to optimise plant survival. If you’re starting a new garden from scratch, you’ll want to remove any turf, weeds or debris before starting. If you just wanted to loosen and enrich the soil from last year you should still remove any weeds or debris, including rocks and stones.
You’ll need a shovel and a garden fork. Using the shovel, mark a line around the area you’ll be cultivating. Dig in the shovel as far as it will go and lift up the soil and dumping it in a pile outside the desired area. Once you’ve dug out the area, use your fork to turn the soul and loosen it further. Using a shovel sprinkle organic compost onto the turned soil to enrich the soil. Finally fill the area with the soil that was initially removed. For those who have a large vegetable garden, it may be worth it to invest in a motorized tilling machine that will break up the soil making it easier to get started. Keep in mind, you would still need a fork to work in compost and break up any remaining large chunks.
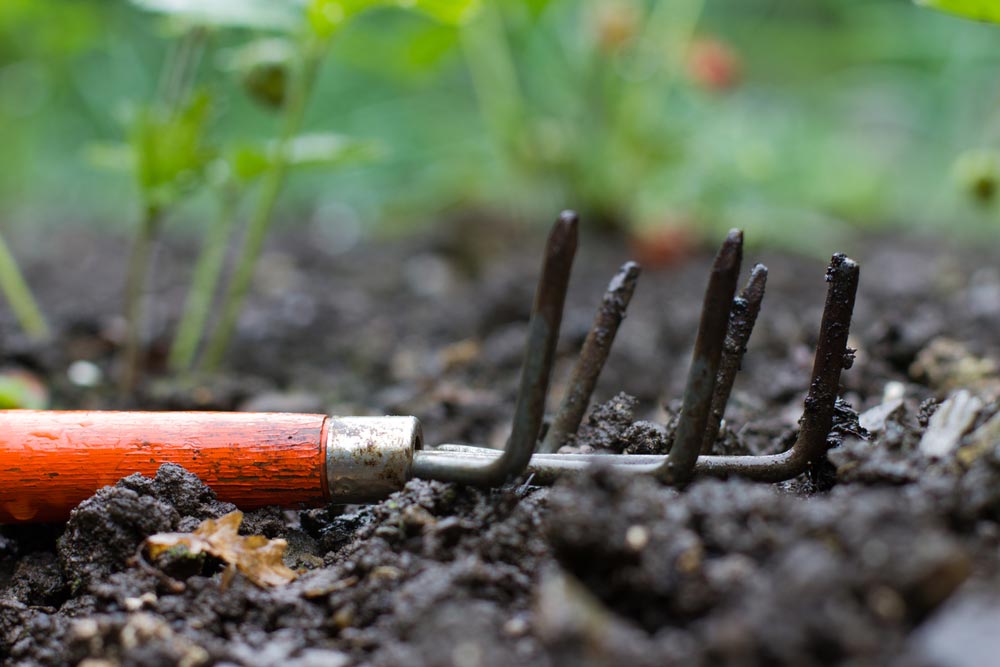
Once your garden is established you can lightly cultivate the surface of the soil using a pronged, long handled cultivation tool. This will help control weeds by lifting the roots to the surface to dry out. Use the prongs to dig underneath the roots and lift the weed out of the ground. Anyone can do this with a little practice. Doing this once a week can save you a lot of time bending down to pull weeds by hand.
Spacing and Sizing
When buying plants, you’ll notice a spacing guide on most plant tags, telling you how much room to leave between each plant. Although this number is a good rule of thumb, it doesn’t always have to be followed. With most plants you can go up to three inches closer than directed. But remember to always stay at least six inches from the edge of your flowerbed. Taller plants should always be placed on the North side of the garden to prevent shading, and shorter plants on the South, respectively. If you have more than one of the same plant, try to plant them together because they will support each other during the season.
It’s always helpful to make a diagram of your garden on grid paper before you start. Doing this will help plan how many flowers you need, where they will fit and how they will look all together. To start your garden bed, you’ll need rich soil and to achieve that, you’ll need to cultivate the soil in your garden (see above), whether it’s in a raised bed or on the ground. Once you have your soil, you can go ahead with the planting. To avoid any hassles, make small markings in the soil showing where you want your flowers to be before you start digging with your trowel. When they’re all in the ground don’t forget to give everything a generous watering. To add some flair to your Mississauga garden maintenance buy yourself a funky watering can or better yet, style one yourself.
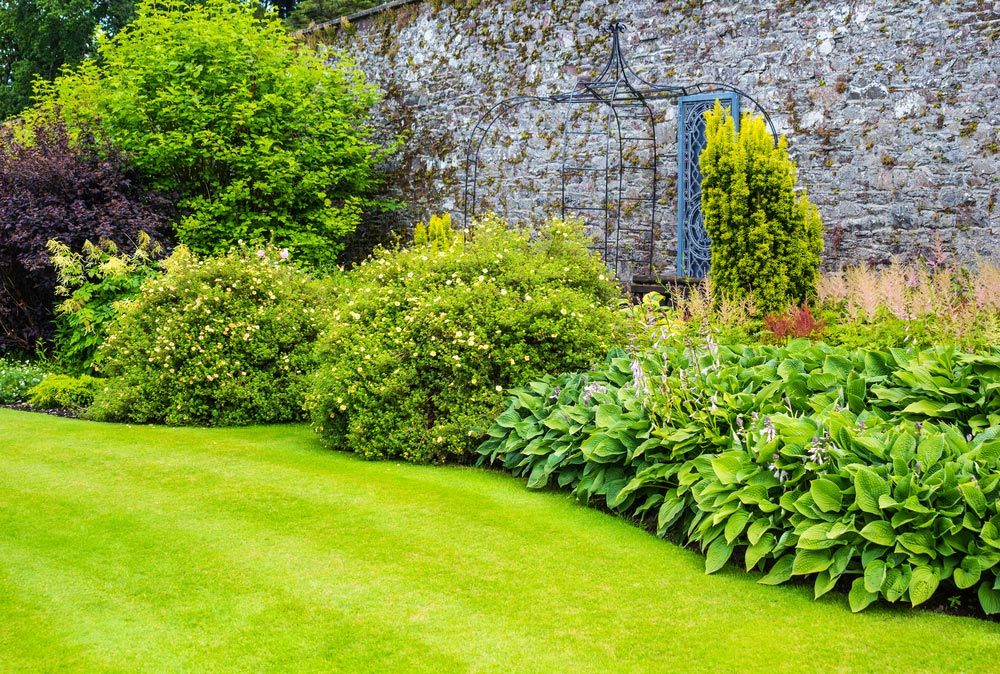
Having a full garden with large plants will help prevent weeds from taking over your garden. They will block out the sun and use up water and nutrients from the soil. Hostas are a great option to fill in your gardens. Their giant leaves shade the surface of the soil and they get larger every season.
Pruning and Transplanting
As your plants start to grow they will need pruning and transplanting. Different plants need to be pruned at different times of the season and learning when exactly to prune takes experience and practice, so don’t be afraid to make mistakes in this area. Get yourself a good book on common garden plants and how to care for them. The actual pruning isn’t the hard part, knowing when to prune is the key. Some plants require regular pruning while others require spring and/or fall pruning. Once you start pruning you will remember what needs pruning and when. Before you know it, you’ll be a pruning wizard.
Pruning keeps plants healthy by triggering new growth, removing dead growth and controlling plant size. When garden plants get too big, they encroach on each other and compete for resources. Proper pruning of flowering plants can create more blooms, which leads into our final topic “Enjoying Your Flowers.”
Transplanting is the process of splitting or dividing your plants and relocating when they get too big, or too plentiful. When plants encroach on each other and pruning is no longer an option, you may need to dig the plant up, split it and relocate some of it to another area in the garden. Some plants like hostas create new divisions each year and grow larger and larger. When they become too large they can block out the sun from neighboring plants and kill them. To split them, remove a section of the roots with a sharp spade. Dig a hole where you want the new section planted and water well. Place the new section in the hole and cover with soil. It’s that simple.
Different plants require different methods of transplanting, so it is a good idea to do some research. Some plants are more hardy and can be split anytime in the season, while others may need to be split in the spring or fall.
Enjoying Your Flowers
Have you ever heard the saying, “have your cake and eat it too?” Well then you probably never thought it could be possible. Think again, but this time with flowers. Most of us don’t want to trim the beautiful flowers from our gardens because of the hard work we’ve put into to having them there – even if it means seeing those same flowers on the kitchen table. But, by choosing the right flowers, and a specific spot for them, you can admire your flowers blooming in the garden AND on the table. This will also save you from spending money on bouquets at the super market.
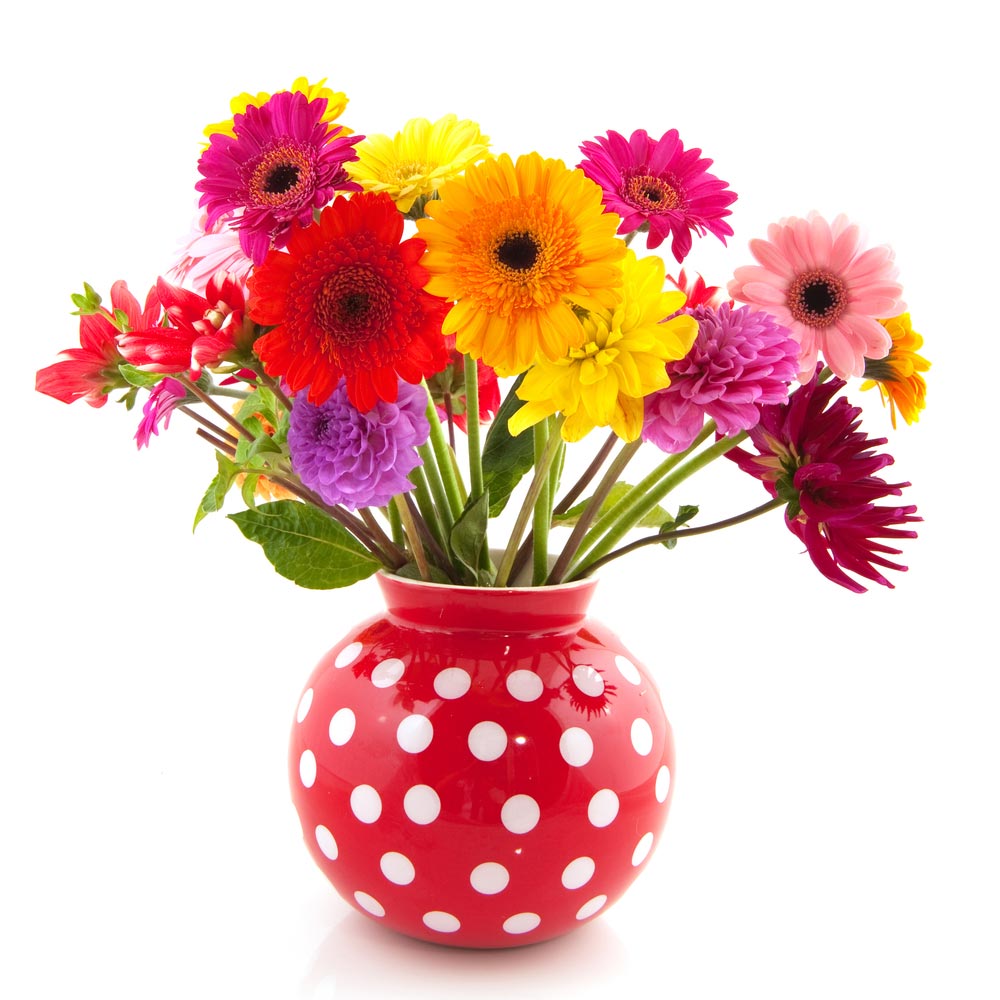
When choosing the right flowers for cutting aim for ones with long stems (like daisies) for easier cutting and arranging, and choose flowers with a variety of blooming times (early, mid and late summer) to ensure you have some for the whole season. When it comes to choosing a spot in your garden remember that most cutting flowers prefer lots of sun, so the area in your yard that has sun for most of the day is ideal.
If your soil is sandy, swampy or rocky, you’ll need to build a raised soil bed for the best results. If not, remove and grass from your desired area and cover it with eight to 10 inches of soil. To better the soil use a spading fork to mix four to six inches of organic material into the area. Just before you plant add fertilizer to the soil.
When planting, remember you’re going to need space between each flower so plant in rows, like crops. Place tall plants at the back of the garden to ensure they don’t shadow the shorter ones. Lastly, group the flowers based on their watering needs to make your Mississauga garden maintenance easier.
Whatever project you decide to take on in your garden, remember to always clean your tools. After each use, remove any remaining soil. Dipping tools in a bucket of sand is an easy and efficient way to do this, and don’t forget to apply oil before storing them to prevent rust. Remember, a sharp, and clean set will get the job done faster and last longer.